When Graham and I started with ceramics, we had very little idea of what was involved. I knew a little about clay and hand-building from my previous experience, but I knew nothing about wheel throwing. Turns out that a lot of time passes between when you first lay hands on the lump of clay to when you hold the finished product.
Thought I might go through the process and explain it, in case you’re curious.
- Choosing clay – all our pieces are made with Keanes Stoneware 7. It is versatile and reliable. It fires white and has no grog. Grog is coarse particles added to the clay to make it gritty and increase its strength.
- Kneading – when the clay comes straight out of the bag, it is stiff and hard to work with. While you can put it straight on the wheel, you are better off kneading it first. Kneading clay will make it easier to work with by making it more pliable and will eliminate air bubbles. You can knead the clay by hand (called rams head wedging) or on the wheel by coning, or you can do a combination of both.
- Centring – Next you need to centre the clay on the wheel, this involves pushing and shaping the clay while the wheel spins. The clay must be centred; otherwise, your bowl/pot will be wonky and hard to work with.
- Create the form – I have no idea how to adequately explain this in words. It basically involves pushing and moulding the clay into the shape you want to make (maybe I should get Graham to tell this bit some other time). When you make the piece a foot piece of clay is left at the bottom, this is to help its stability as you lift it off the wheel.
- Cutting – once the piece has been created, you need to carefully cut through the bottom with a wire and lift it off the wheel.
- Dry to leather hard – the piece that comes off the wheel is incredibly soft and wet; fingerprints are easily left behind. This needs to be dried slowly and evenly to prevent cracking and collapsing. Leather hard is when the piece is cool to touch, you do not leave fingerprints when you touch it, but you can dig a fingernail into it easily.
- Trimming – once a piece is leather hard, it can be trimmed. This means the excess clay is cut off. You turn it upside down and use small blocks of wet clay to secure it to the wheel. Trimming involves cutting away the excess clay on the bottom of the pot and usually leaving a foot ring. I usually trim using a variety of tools, these include ribbon tools, loop tools, metal ribs and these pointy things that I do not know the name of (I think they are just called trimming tools).
- Makers Mark – now that the piece is leather hard and the bottom is beautifully finished, it is time to add your maker’s mark. In our case, we use a custom stamp.
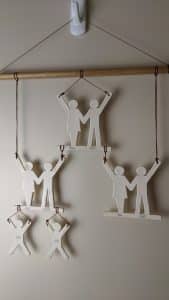
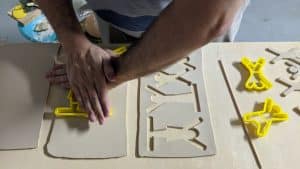
- Adding artistic flair (optional) – this is the point that I would assess a piece and decide if I should play with it or leave it alone. I will sometimes carve patterns or cut out shapes – wherever the mood takes me. I should be honest and say that sometimes I start something and then curse myself for starting something time consuming or fiddly as a half-finished pot never looks good, so I have to keep going.
- Bone dry – now we leave the piece to dry out completely. At this point, it is extremely brittle and fragile. The pieces need to be bone dry to go in the kiln; otherwise, they are at a higher risk of cracking. The piece is now known as greenware
- Bisque firing – bisque firing is the first time the piece goes into the kiln. It is a long firing process that forces ALL the water (including chemically bonded) out of the piece. It transforms the clay into a durable semi-vitrified porous stage where it can be safely handled during the glazing and decoration stages. The piece is now bisque ware.
- Glazing and decorating – This is my favourite part. This is when you dip, paint or spray glaze onto the surface of the pot. I will save the discussion about what glaze is for another post. My preferred method is dipping as it is the fastest and the best way to get an even application. The glaze adheres to the clay body as the body is porous.
- Glaze firing – this is the second time the piece goes into the kiln. It is a firing process that enables the glaze to fuse to the ceramic body of the piece. The glaze then becomes an impervious layer on the piece. It is important that the piece is really carefully handled into the kiln as to not disturb the powered glaze layer and it must not touch any other pots in the kiln as will fuse them together permanently.
Depending on how slowly we dry the clay, or how long we wait between steps, this process could take between a week and 4 weeks.